Knowing how to How to properly tie your saddle is one of the most important things new riders need to learn. Below I am going to walk you through, step by step the procedure that I use to ensure that I won’t end up under my horse instead of on top of it.
To saddle up your horse you need to follow these steps:
- Prepare your horse
- Place your saddle
- Attach the girth
- Put on your bridle & reins
- Add optional Accessories
In all honesty, this is totally easy once you get the hang of it. I recommend taking your time and following the steps below until you feel comfortable doing it on your own. First and foremost you need to properly brush and prepare your horse.
Step By Step
1. Prepare your horse
First off you need to properly prepare your horse to be saddled this involves brushing the horse down and cleaning its hooves. This process is fairly easy to do. The idea is to remove any dirt or debris on your horse that may cause them to be uncomfortable during the ride.
Caked up mud in their hoofs can collect rocks that will cause pain to your horse. The same goes for any mud or dirt that would be under any of the straps or pads you are about to put onto the horse. Do not skip this step!
2. Place the Saddle
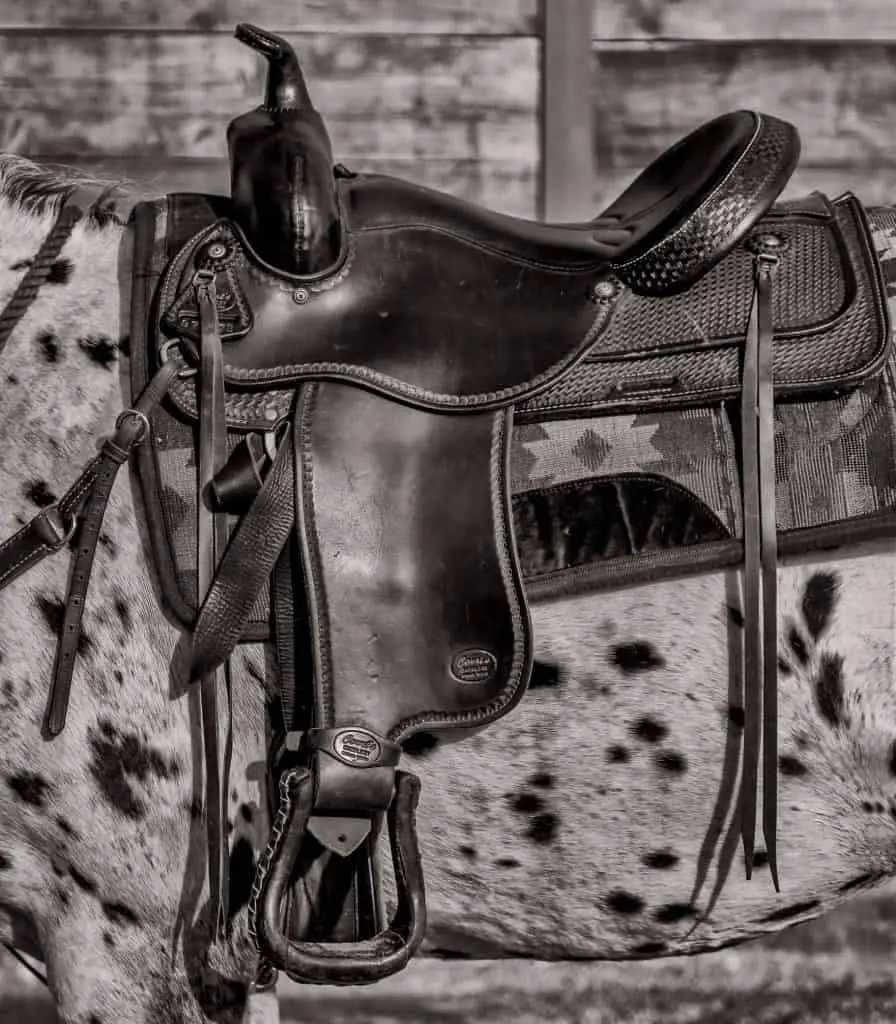
Next, you want to pace your saddle pad and saddle on the horse. The proper location for this is so that the horn of the saddle is directly above the horse’s shoulder blades.
This ensures that the saddle is properly seated and is less likely to wiggle around. It also places the cinch strap in the correct location directly behind the front legs. See the photo to the right.
Again it is important that before doing this step you remove any dirt or debris that would be under the saddle or saddle pad. These can cause sores on your horse which is obviously not good for the animal.
3. Attach the girth
Personally, I just leave my girth or cinch directly on the saddle. However, if you don’t have one you will need to attach it using the belt style clasp to the shorter side; typically this is the left side of the horse. A Girth if you are not aware is a separate strap that comes in multiple lengths so that you can fit one saddle on many horses, dependent on their chest size. For example, this girth on amazon has sizes ranging from 24″ to 36″.
Now tying the cinch knot is one of the most difficult parts of properly tying your saddle. But don’t worry! It’s actually pretty easy. When I first learned I was taught a handy phrase to help me remember “Teeth, Tail, Toes”. Also, it helps a lot if you take the stirrups and place them over the horn of the saddle, just to get it out of the way.
First, Take the long strap from the saddle and wrap it through the girth strap two times. This gives you a “pully” system to tighten down the saddle. Then you are going to thread the strap back through the upper ‘D’ ring towards the Teeth, around to the Tail, and finally behind and through the ‘D’ ring, through the loop and to the Toes. As I write this I’m realizing that text is NOT the best medium to explain it. Check out a few of these videos below for more visual instruction!
4. Put on Bridle and Reins
A bridle and reins attach to your horses head and provide you with the controls necessary to steer the horse. And they are arguably one of the most important items on your horse. Technically you can ride without a saddle, but you always need a way to steer.
Putting them on to your horse is actually pretty easy. Hold the top of the bridle in one hand (typically the right), using your hand to keep the bridle wide. With your other hand hold the bit so that it is flat. Now slowly start to work the bit into the horse’s mouth with one hand while working the headstall (top of the bridle) over your horse’s ears.
One important note is to make sure to re-adjust your horse’s hair at this point. They will not behave normally if the hair on their head is being constantly tugged.
Lastly, tighten the neck strap. This should be tight enough to not fit past their jawbone, but not snug. I like to make sure I can fit at least three fingers between the horses neck and the strap.
5. Add optional Accessories
At this point, you are almost ready to ride. However, there are quite a few accessories you can add to improve your experience. Many of these depend on what type of riding you plan on doing. While others are necessary for some horses but not others.
If you are trail riding you will likely want to attach some saddlebags to hold snacks, water, and other necessities. Personally, I love pommel bags. These hold most of the things I need without being too large and they are right in front of me so I don’t have to do any acrobatics or get off the horse to get to my gear. This bag from Weaver Leather is awesome as it has tons of space and places to put your drinks which is very convenient.
If you are jumping or performing tasks that might cause your saddle to slip there are various straps such as the breast collar that help to hold the saddle in place.
The unfortunate truth is that some horses just are not as well trained as others. Some might just have an attitude. If this is the case for you, you may want to consider adding a tiedown to your setup. These straps hold your horses head downward which helps to prevent them from bucking.
If you want to use a backstrap you are more than welcome to, in my experience, this is unnecessary most of the time. I would caution you to not put a backstrap on a gelding or stallion as their… anatomy can get in the way or rub uncomfortably. The backstrap is attached in exactly the same fashion as the girth strap, just towards the back of the saddle.
Note On Saftey
Lastly before mounting the horse please assure that you have done a quick walk around to make sure everything looks correct. And if you have never ridden a horse before I should tell you this activity can be very dangerous, please proceed with caution. Preferably seek instruction from someone with years of experience, without that guidance you are on your own!